Bot Setup: Difference between revisions
No edit summary |
No edit summary |
||
| Line 78: | Line 78: | ||
=== Spell Setup === |
=== Spell Setup === |
||
| − | In this section you can add spells to be cast automatically. |
+ | In this section you can add attack spells to be cast automatically. |
[[File:Spellsetup.png|frameless|604x604px]] |
[[File:Spellsetup.png|frameless|604x604px]] |
||
Revision as of 19:20, 22 July 2021
Para ver esta página em português, clique aqui.
Para ver esta página en español, haga clic aquí.
Our game client has an inbuilt bot functionality to ease your gameplay. In this page we will brief the basic knowledge in order to get your bot working. You can open your bot by clicking ![]() this icon located at the top right.
this icon located at the top right.
First Steps
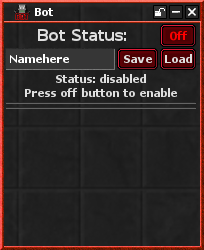
Once opened, your bot will probably look like this:
To turn it on and use its many functionalities, just simply click on that off button.
Main tab
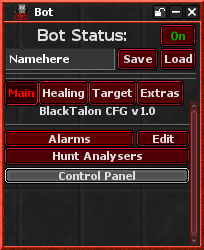
In this tab we've got Alarms and Hunt Analysers.
Alarms
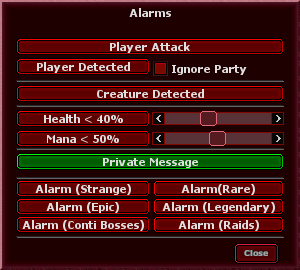
You can edit several parameters within the alarms section by clicking on the Edit button, as shown in the image above. Upon clicking it, you will be prompted with several possible editable parameters, as shown in the image below.
You can enable several features by clicking on the red areas of this window and once it turns green, it means it's enabled and working. In this section we got:
- Alarms for when another player is attacking you;
- Alarms for when a player is seen in your screen;
- Alarms for when creatures are seen in your screen;
- Alarms for when your health or mana is below a certain %, which is configurable by sliding the bar located to the right of it;
- Alarms for when someone private messages you.
After editing to your liking, hit close and turn the alarm section on, by clicking the red area that's written "alarms", as shown in the first image.
Hunt analysers
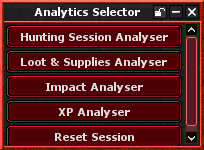
This section does not automate any tasks, but rather shows you some information gathered automatically while you hunt. Upon opening this section you will be prompted to a window like this:
- Hunting Session Analyser tells you an overall information regarding your hunt. Things like experience earned, damage dealt and monsters killed are shown here;
- Loot & Supplies Analyser informs you about your supplies and loot received;
- Impact Analyser informs you about your damage dealt and healing received;
- XP Analyser tells you about your experience gained;
- Reset Session brings all of the values from the analysers back to 0.
Healing Tab
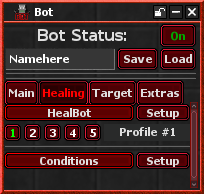
In this tab we've got the Healbot and the Conditions.
You can switch profiles by clicking the numbers (1 to 5). Each profile will retain a different heal configuration.
Healbot
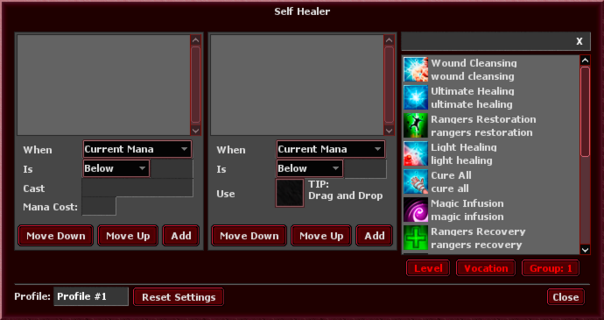
In this section you can configure healing spells and items to your liking.
On the top section you can configure your healing spells and on the bottom section you can configure healing items.
- When is used to set a condition whether it's a certain amount or percentage of health or mana;
- Is is used to set a condition whether it's above, below or equal a value, that can be specified in the box located at the right of it. If you selected percentage in the first box, please use a number within 0 and 100;
- Cast is used to type in the healing spell that you want to use to heal yourself;
- Use is used to select the item that you want to heal yourself with. Click on the square to the right of it and a menu will open, like this
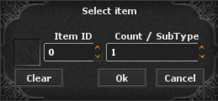 You will need to type the item's ID (you can check the ID by shift clicking the item).
Conditions
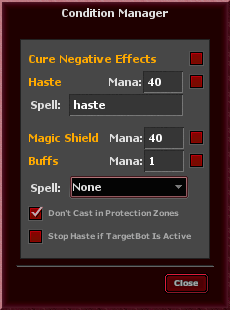
In this section you can configure some spells that depends on certain conditions
- Cure negative effects will cast Cure all whenever it sees that you have a negative effect, such as poison and burning;
- Haste will automatically cast your movement speed spell, by typing it into the box to the right of it, given that you have enough mana for it;
- Magic Shield will cast Magic Shield automatically. Keep in mind that magic shield is a toggle spell, meaning that it will stay active until you die or log out;
- Buffs will cast your class specific buff automatically given that you have mana for it. You can select the desired spell on the box below it.
Target Tab
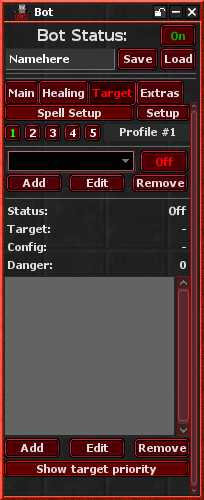
In this tab we've got anything related to auto targeting.
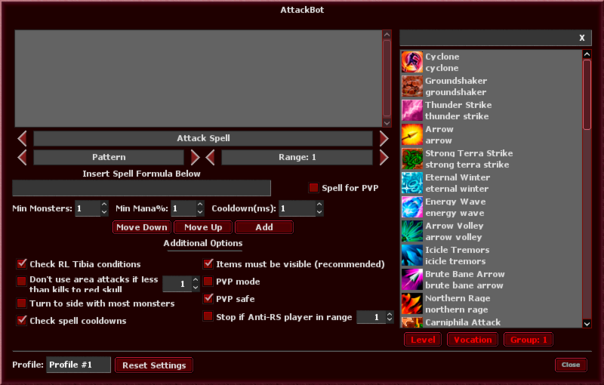
Spell Setup
In this section you can add attack spells to be cast automatically.
You can edit the range (maximum of 9, mininum of 1), number of monsters in order to cast the spell and the minimum amount of mana (in percentage) that you need to have in order to cast it.
Note: Spells located in top positions will have higher priority in the rotation.
Targeting
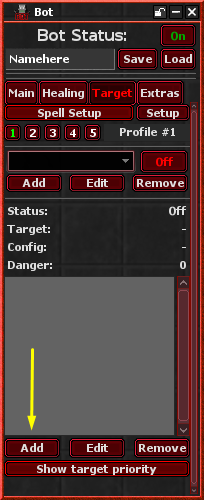
Going back to the targeting tab, shown in the first image, you will firstly need to create a new profile by clicking on Add and typing any name that you desire. After creating a profile, make sure it's selected. To configure it, you will need to click on Add, the one located in the bottom of this tab.
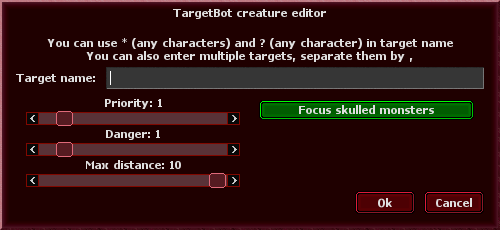
After clicking it, you will be prompted to a window like this:
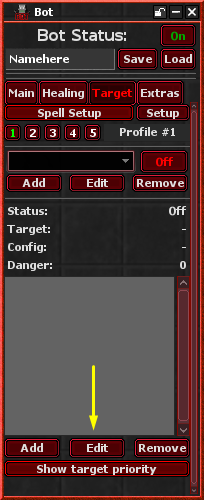
In this window you can configure however you'd like. If you wish to re-edit the same configuration, you can simply click on Edit.
Note: Lure using cavebot no longer works.
After setting all up, just click on the Off button, as shown in the image above and it should work.
Extras Tab
In this tab we've got a lot of miscellaneous options.
- Exchange Money automatically converts 100 gold coins into 1 platinum coin, 100 platinum coins into 1 crystal coin and 100 crystal coins into 1 bloody crystal coin;
- Send message on trade automatically sends the message below of it into trade chat;
- Sio is used for druids if they wish to heal a friend. Note: The first name has higher priority than the second name;
- Manatrain will automatically spam a desired spell, which you can type on the box below of it;
- Auto Seller - Strange/Rare will automatically break all your strange and rare gear;
- Eat Food will automatically eat the food specified in the little menu above it, which you can configure with different types of food, given that you have the food in your backpack.
